
WordPress actually has a rather powerful system to manage trolls and spammers. But still we require some dedicated plugins to handle this problem. Akismet is said to be the most famous anti-Spam plugin which is employed on nearly every WP blog. But, some trolls simply evade this safety and produce repulsive experience for the blog owner plus the society all together. Though no silver bullet is there to prevent them, however captcha systems perform as prevention to a certain range. In this tutorial we are giving the list of best WordPress powered blogs and web sites captcha plugins.
Here’s the collection of best captcha plugins for WordPress powered web sites and blogs. These plugins effortlessly implant a captcha form that can’t be avoided by automated trolls and spam bots. This considerably decreases the amount of spam that you are presently getting on your WP website. If, you are not getting extra spam on your blog, we will suggest you to ignore such plugins because they reduce the user experience for real visitors.
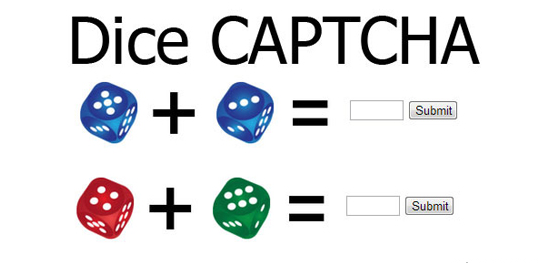
What exactly is Captcha Code?
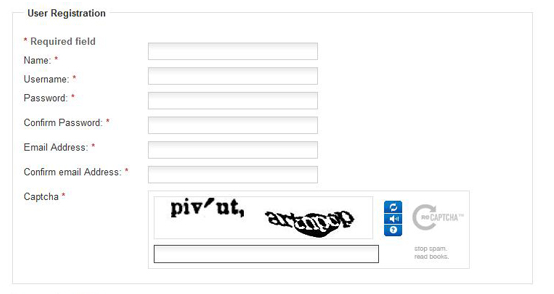
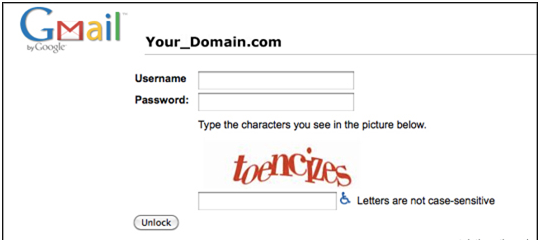
Captcha are actually very smart codes and they’re used to test the human response. The full form of Captcha is: “Completely-Automated-Public-Turing-test to tell Computers-and-Humans-Apart.” The logic behind why sites use Captcha code at the time of their registration processes is due to spam. Those insane letters are used to see whether the person trying to comment or registering is genuine human being rather than a computer program trying to hack the website. This, is the similar reason the majority of people have some sort of spam blocker on email. Actually, spam is the contemporary day related to the junk mail. However, if the spammers were in command, the junk mail would not be into your inbox or attempted to your knob.
Though it is irritating to frequently be asked to type in the tangled words given in an image, it’s worth using them in the long term. anybody who has built their individual blog or website will get a feel of what bots is like up personal and close just a few weeks after building the site – though if that blog or site has close to no traffic at all. Those trolls find small blogs and sites fast and aim them as they frequently do not have much safety to secure them.
If a blog or website did not employ some sort of security such as Captcha against it, they would be receiving loads of comments or spam registrants in a day. Well, this is only for personal blog or little sites that are not extremely famous. We can just visualize what the famous blogs has to see.
And that’s just for small websites and personal blog that aren’t very popular. I can only visualize what the popular blogs must see.
So, whenever you run up beside one of those pictures and gets a bit of irritation attempting to indicate a Q resembling an O, just try not to emit your irritation at the site.
Best Captcha Plugins for WordPress
This tutorial has the great range of best Captcha Plugins for WordPress. These plugins will aid to decrease loads of spam comments from the blog or website. So, do not wait for more. See this collection and pick a suitable WP capcha plugin and enjoy.
-
Google-Captcha (reCAPTCHA) by BestWebSoft
reCAPTCHA or Google Captcha is a totally free WordPress captcha plugin which allow the captcha safety on your commenting scheme. BestWebSoft is said to be famous or reliable developer company which create the good plugin that’s why this reCAPTCHA plugin is on the primary place. reCAPTCHA plugin can employ in the contact us form, reset Password, registration form, login form, and comment form. It’s extremely easy to install this plugin to apply the captcha form.
Key features
- Multilingual and RTL ready
- Capable to hide
- You can ensure the strength of keys from the administration panel
- Include Recaptcha into any form
- It has the option to cover Recaptcha for users who have whitelisted IP addresses
- Recaptcha themes accessible for version one consist of black, white, red glass clean and white
- Version 2 contain light theme as dark and default ad optional
- For a few user usage the reCAPTCHA can be covered
- reCAPTCHA or Google Captcha supports both version 2 and 1
- Custom code can easily be included through the plugin settings page
- Compatibility along with all the recent WP editions
- Easy to read videos and documents for tutorial
- Easy settings
-
Math Captcha
It is extremely simple captcha plugin for WP which ask from bots or users a math question at the time of registrations, login, sending email, comment etc. These maths questions are hard to answered by automated scripts, bots, however a human being can easily understand and answer it. This plugin is efficient from automated spam, however less efficient from manual spam. There are some other captchas that can stop manual spam.
Key Features
- Choose which mathematical function to use
- More than one captchas on single page support
- Option to set field title for captcha
- Option to set input time for captcha
- .pot file for conversions included
- Showing captcha as words or numbers
- Hiding captcha for registered users
- Decide where to employ math captcha: i.e. bbPress, Contact Form 7, comments, forget password forms, and registration form
-
Captcha Plugin
This effective plugin enables you to apply a great security captcha form within web forms. Captcha Plugin safeguards your site from bots and spam through math logic, simply comprehended by human beings. You won’t require spending your expensive time on aggravating efforts to comprehend complex images, combinations of letters, and complex words. You just need to perform 3 simple maths calculations – multiply, subtract, and add. You can use this plugin into your website’s comments, password recovery, registration, and login form. In addition, there is a best edition of the plugin, which enable compatibility with BuddyPress (“Create-a-Group” form), Comments form, Registration form) as well as Contact Form 7.
-
MyCaptcha – Strong Human Verificator
It is a spam security plugin for WordPress blog and website. This plugin helps you to make your website secure from bots just by including captcha to test Intelligence. It’s quite simple to integrate My captcha plugin on any WP website or blog. Also, this captcha plugin secure Request password form, Register form, Login, and Comments form.
Key Features
- Almost 37 Options for customization
- Custom Fonts
- installation is easy
- 7-Image Filters
- Secure Request password form, Register form, Login, and Comments form!
- Custom Dictionary
- Wave effect to Image, Text or Both.
- Bazillion grouping
- Clean design.
- Auto-refresh feature.
- 3 Dictionaries incorporated with over 50000 words!
- Highly Configurable
- Use Solid Colors or custom Backgrounds
- Multi-instance
- Come back as base64 or Image encoded Image.
-
Conditional CAPTCHA
This plugin is an unusual plugin from all the other available plugins. It contain 2 different modes known as Akismet-enhanced and basic. Basic mode means that when readers comment for the very first time they see find captcha, however if they already crack the captcha security then next time they don’t require answering the captcha before posting the comment. In Akismet enhanced mode, this plugin doesn’t display captcha to all visitors. In case Akismet recognizes the wrong thing then visitors has to clear the captcha.
Key Features
- Compatible with Akismet
- Akismet-enhanced Mode
- Basic Mode
-
Anti-spam Pro
It is a finest WordPress plugin which blocks trolls in the comments section. This plugin isn’t a captcha plugin, however protect your blog completely from automated troll which is created by automated spam. Plugin differentiates manually submitted and automatic comments and makes use of the different bot checks to mass spam. Users can make use of the plugin with default WP comment system and CommentLuv plugin, however not consistent with bbPress, AJAX Comment Form, Jetpack Comments, and Disqus.
Key Features
- Block 70 percent of bot from manual bot
- Block 100% Spam from automatic spam
- User-friendly
- No captcha
-
SI CAPTCHA Anti-Spam
This plugin is a free WP plugin to allow the captcha on your website or blog. This plugin is extremely popular WP plugin and it has more than 3,00,000 active installations which make SI CAPTCHA plugin special. With the help of this plugin visitors can include this captcha to WP forms for contact us, guest-post submission form, login form, registration form, and comments form. This plugin is completely BuddyPress, WPMU, and WP compatible.
Key Features
- 18 language translation support
- Valid HTML
- Setting to display the captcha on the login form, reset Password form, registration form, comments etc.
- build up from Admin panel
- WAI and Section 508 Accessibility Validation.
- Enables Pingbacks and Trackbacks
- Setting for hiding the CAPTCHA from admins or registered users
-
Free Captcha WordPress Plugin
This plugin includes anti-spam methods into WP forms for login, lost password, registration, comments, or all. For registration or posting comments, visitors require typing the code displayed on the picture. This protects bots and automated spam. This plugin also adds security and it runs well with Akismet. This is also completely BuddyPress, WPMU, and WP compatible.
-
Captcha Bank
Similar to its name, you can store your cash in this plugin. As soon as you configure this plugin, you’ll forget what the spam is. Not just spam, bots also won’t be capable to enter into your site or blog.
Key Features
- Easy math actions
- Choose where to display Captcha
- Make Captcha by a blur images, adding lines etc.
- Tailored text Captcha
- Make Captcha case-sensitive
- It supports WooCommerce, BuddyPress, and Contact Form 7
- Email notification accessible
-
VouchSafe CAPTCHA Replacement
At present new technologies being applied to deal with bots and spam. That’s why, here comes the VouchSafe plugin. The pioneering challenge system in this plugin makes it nearly not possible for machines to avoid the check. You will require a publisher key for using this plugin into your blog.
Why Captcha Is Important?
Fundamentally, captcha is a program which tells whether its visitor is a bot or human being. They are vibrant pictures with unclear text at the end of registration or login forms in several internet application development sites. Captcha are employed by several sites for avoiding violence from automated Scripts or programs or “bots” basically written to create spam. These indistinct pictures can only be read by human being and not by automated programs, and therefore bots cannot explore the websites secured by Captcha. Some sorts of bots are dangerous when attack a website.
Accessibility and safety are 2 leading problems that should be satisfied by a Captcha. The earlier problem of safety is totally satisfied by giving a wonderful security from bots. Another problem is on the edge of a huge challenge, since Captcha is dependent on the image vision which could be difficult to the regular users and unfeasible physically disabled users.
Captcha tricks the bots just by asking questions that can only be answered by humans. It produces a picture which includes tangled characters and different images with different characters are produced. In the end, it asks the user to type the letters displayed in the image. In any case, each and every letter is not recognized by bot. When the user publishes or posts the answer Captcha validated the answer.
What are the Advantages of Captcha
By differentiating among automated computer programs and human being, captcha provides security and protection in several ways. Let’s have a look at some of the major benefits of using captcha in website or blog.
-
Securing Registration-Forms in Sites
Several sites or blogs like Yahoo, Twitter, Facebook, Hotmail, Gmail etc. provide free membership for users. Hence, to secure the process of registration, these sites have integrated captchas. Actually, for any website that is providing free membership, it’s best to include captcha, so that the processes of registrations are performed by human being and not by bots or programs.
-
Securing Email Accounts
Several people have faced loads of problems or other in their mailing accounts wherein the account has been overtaken by hackers or nasty people. If you’ve faced the same condition in the past, you have to understand the dangerous effects brought to you by this issue. You’ll discover that you can’t log-in to your e-mail account anymore. Captcha helps you to protect your site from all the concerns.
-
Secure Online Shopping
Online shop owners usually use Captchas in their website so that customers can fill them up before starting any sort of transaction process. In an online shop, the reasons behind using captcha is to make sure that people who’re placing orders for services or products are human only. Furthermore, by making use of it, online shop stores can topple the danger of getting spam or fake orders.
-
Ignore Spam Comments
Spammers are able to attack one post with thousands of comments. In that case one thing take place, leading search engines like Google, Yahoo, or Bing would be presuming the sites that have loads of comments or feedbacks for one post are calling spam. To ignore this, it’s vital for the owners of the website to use captcha, so that one real human can post their comments.
-
Securing Registration Forms in Sites or Blogs
There are lots of websites for example; Yahoo, Twitter, Facebook, Hotmail, Gmail and many other that provide the service of free registration to the users. Hence, for securing the process of registration, these sites have included Captchas. Actually, for any website that is providing the service of free registration, it would be best to add Captcha, so that the process of registrations can be performed not through bots or programs but through humans.
-
Compatibility
There are so many WordPress Captcha plugins available on the web that offer different kinds of modes. KeyCAPTCHA is one of the popular plugins having 2 operating modes; one is HTML5 and another one is Flash. HTML5 mode is employed in latest browsers, like Safari, Google Chrome, Mozilla FireFox and also employed in iPad and iPhone. On the other hand The Flash mode is used in Opera and Internet Explorer. At the time of loading, KeyCAPTCHA plugin recognizes its operating mode according to the visitor’s browser.
Conclusion
Blocking bots and spam from the website is extremely vital, not just for your blog or website but also for users. Sometimes information is grabbed from the visitors such as their email ids. Spammers are not good instead they are harmful for both the visitors and your website. But, with the help of these plugins, you can just eliminate spam and protect your site to give a safe experience to all your visitors. After having a look at all the Captcha Plugins for WordPress, if you’re seeking to protect your site from bots to stop expected loss of your business, just download one of them with no hassle of coding.